Set up a Raspberry Pi Zero headless
If you are using the GUI (Raspian full download) and want to connect your RPi Zero to a keyboard and monitor there are probably easier ways to do this. These notes are for people that want to use a headless (no monitor and GUI) setup ready to connect to your RPi after first boot via SSH from another terminal.

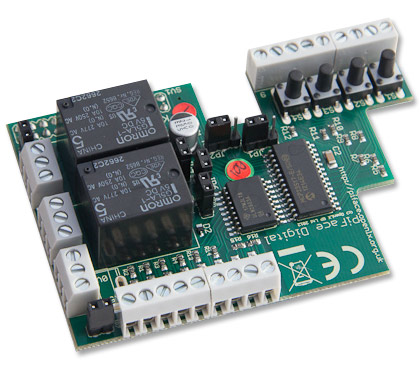
RaspberryPi Version 3 SOE
Since there is now a supported Raspbian version without GUI and other unneeded add-ons available as Raspbian Lite the need to use other installers (with sometimes some downsides) is now not a necessity anymore. Below is a list of steps I like to perform before using them for any purpose as my Standard Operating Environment.
Download Raspbian Lite
Download link: https://www.raspberrypi.org/downloads/raspbian/
Write to SD Card
dd bs=4M if=2016-05-27-raspbian-jessie-lite.img of=/dev/sdbBoot RPi
Default login details are
UID: pi
PWD: rasbperry
Paperless Office using the Raspberry Pi
This is a follow-up on an older blog using Ubuntu.

Creative Commons Creative Commons Attribution 2.0 Generic License (http://creativecommons.org/licenses/by/2.0/) by rosmary
Raspberry Pi Prerequisites
Since this will be a purely headless install designed to sit in a corner behind the scanner I am using a Base Raspian (Debian Wheezy) install (I personally like the clean minimal install via https://github.com/debian-pi/raspbian-ua-netinst the best).
RaspberryPi real-world control with REST API
Finally found some time playing with a RaspberryPi and an attached PiFace Interface board to control some garden pumps and potentially an Aquaponics setup in the near future.
Requirements
- Raspberry Pi (Model B in my case, but any will do)
- PiFace Interface board (http://www.piface.org.uk)
Base Raspian (Debian Wheezy) Install (I prefer the clean minimal install via https://githutb.com/hifi/raspbian-ua-netins).
Configure the base system as per my previous base install.
SMS Gateway using Sierra Wireless USB Modem on Debian Wheezy
I have been planning to set up a SMS Gateway for sending and receiving SMS messages via a headless utility unit (Raspberry Pi) for a while. Since I had a leftover Sierra Wireless AirCard 880U from Telstra in Australia I wanted to re-purpose this unit with a spare SIM card. Unfortunately it was very hard to find any good setup manual for this particular combination and took some time to fiddle & debug. This is the working setup for future reference and hopefully it helps somebody.
FreedomBox + RaspberryPi = FreedomPi
I have been watching progress on FreedomBox ever since watching a video of Eben Moglen a few years ago.
Turns out that that they recently announced the availability of their 0.1 preview release. As part of this there is one component that is extremely useful for RaspberryPi users (funnily the co-founder of RasperryPi is also called Eblen by first name – go figure) out there concerned about increasing snooping of private information by governments and corporations for a variety of reasons.
Enabling the watchdog timer on the Raspberry Pi
Turns out that the Broadcom BCM2708 chip on the RPi has a hardware watchdog. This can be very useful if your RPi is located remotely and locks up. However, this would not the preferred method of restarting the unit and in extreme cases this can result in file-system damage that could prevent the RPi from booting. If this occurs regularly you better find the root cause of the problem rather than fight the symptoms.
Dropping the wires on the Raspberry PI
Testing the RPi for some remote sensing application I needed to use a wireless connection as it would have been a pain to reach with an Ethernet cable.
Parts
- Raspberry Pi Series B 512MB
- Raspbian 3.6.11+ Kernel
- Comfast 802.11n – Realtek RTL8188CUS WLAN Adapter
Install WPA Supplicant
sudo apt-get install wpasupplicantSee http://en.wikipedia.org/wiki/Wpa_supplicant
Check for the USB adapter
sudo lsusbThis should show output similar to this (depending on your USB adapter)
Webserver and database combination on Raspberry Pi
My normal combination on the big-server side would be Apache + MySQL (or PostgreSQL), but on the RPi this seems to be absolute overkill. For data-logging operations I would not use the local system anyway (looking at MQTT as well as Remote MongoDB datastore via REST Webservices).
After some poking around and reading up on the options I decided to go for the following combo: LightHTTPD + SQLite. Both are lightweight replacement of their fully-featured big-server counterparts (Apache HTTP & MySQL) and have very familiar configurations. There would be other options that have even less resource usage, but I really don’t have the time to start from scratch somewhere.
Raspberry Pi - Raspbian post install tasks
The Raspbian Install process is fairly well documented using the Raspbian Installer. This is just to document common tasks after the stock install.
Install base utils
apt-get install sudo vim ntpdate git-core binutils make gcc ca-certificates rpi-updateAllow non-root user account access to ‘sudo’
adduser USERNAME sudoFor those Ubuntu users there is no ‘admin’ group in Raspbian (Debian Wheezy).
NTP time update
sudo rm /etc/localtime
sudo ln -s  /usr/share/zoneinfo/Australia/Adelaide /etc/localtime
sudo ntpdate -u au.pool.ntp.orgProbably best to choose an NTP Server closest to your location or provided by your ISP
Accessing 1-wire devices on Raspberry Pi using OWFS
To connect 1-wire serial devices to the RPi I am using a DS9490R USB 1-wire adapter (rather than wiring I2C 1-Wire master components to GPIO I2C – which I might look at sometime down the track)
Install packages
sudo apt-get install owfs ow-shellEdit config file
vim /etc/owfs.conf! server: server = localhost:4304
# USB device: DS9490
server: usb = all
######################### OWFS ##########################
mountpoint = /mnt/1wire
allow_other
####################### OWHTTPD #########################
http: port = 2121
####################### OWFTPD ##########################
ftp: port = 2120
####################### OWSERVER ########################
server: port = localhost:4304Create Startup Script
I created a startup script for owfs modelled on the owserver script (not sure why this one is actually missing)
Installing OMXPlayer on Raspberry Pi
Since I didn’t have any luck playing videos on the RPi using mplayer I found omxplayer after some search. It has the ability to use the RPi’s GPU thus taking some load of the CPU.
UPDATE 2013-04-01: omxplayer is now included in the Raspbian (Debian Wheezy) repositories and can be simply installed by one line.
sudo apt-get install omxplayerCheck another article on how to install Raspbian.