Ubuntu 14.04 Amazon EC2 Cloud Desktop using LXQT
Using Amazon EC2’s free usage tier to host your own cloud desktop is a very economical way to to have a desktop at hand anytime you can not be near one. Since I quite often use Chromebooks these days when on the road this is a particular handy way should I need a full desktop for certain tasks.
Since Ubuntu 14.05 is my default desktop on my normal hardware I obviously want to have my cloud desktop running the same underlying OS. However I don’t think running Unity as the desktop interface would be appropriate via a low-bandwidth remote desktop connection. For this reason I chose LXQT. If you need total stability you probably should go for the more mature LXDE instead, but I have already tried LXQT on an old EEE PC and was very impressed by the speed and low resource usage.
NOTE (Edit: 2014-11-03): Please find an updated (and easier) version of this blog here. I was experiencing some issues with LXQT (which is understandable as it clearly states that it is not a release version)
Provision Ubuntu 14.04 LTS EC2 Instance
Instance details
- Connect to AWS Console and go to EC2 Service
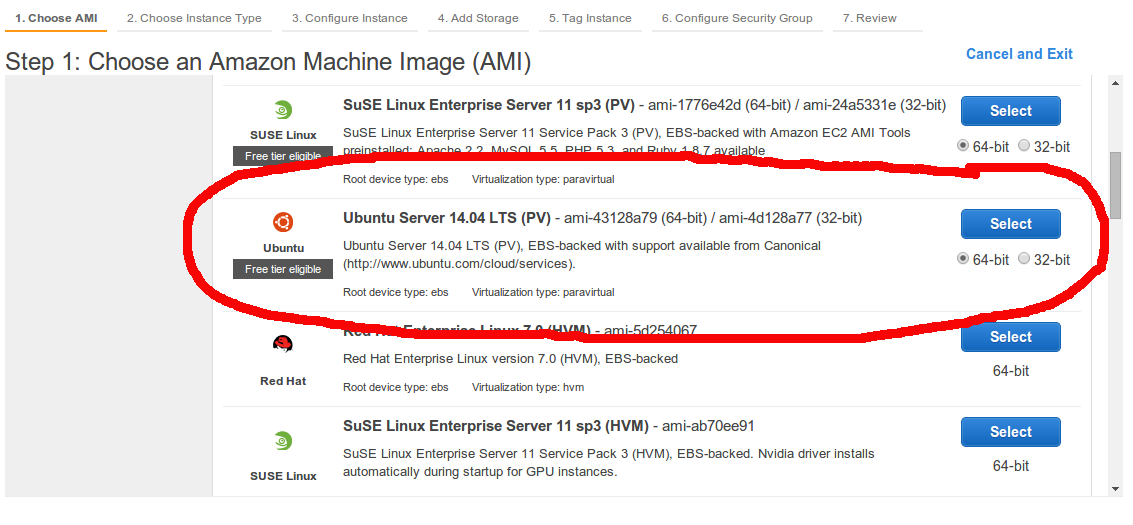
- Choose OS Image: “Ubuntu Server 14.04 LTS” (see screenshot)
- Choose a “Micro Instance” if you want to use Amazon’s Free Usage Tier
- Choose Instance details – the defaults will generally be fine
- Add Storage (I generally add a separate Volume for /home but default should do)
- Tag instance (just give it a name to that makes sense to you in the console if you have more than one)
- Configure Security Group – I only set SSH which is the default (see Firewall config below). Add any other ports needed
- Review & Launch the instance. You need to choose your RSA Access Keys in this step. If you haven’t got any and download. DO NOT LOOSE the private keys or you will not be able to connect.
Setup Desktop & VNC
Connect via SSH to the EC2 Instance you just created (using the IP in the control panel and your RSA Key)
sudo apt-get install software-properties-common
sudo add-apt-repository ppa:lubuntu-dev/lubuntu-daily sudo add-apt-repository ppa:gilir/q-project sudo apt-get update sudo apt-get upgrade sudo apt-get install lxqt-metapackage lxqt-panel vnc4server`
Start VNC server under the desired user account. This will create the desired configuration files. Kill after the startup process is finished.
vncserver
#after successful start vncserver -kill :1`
Edit xstartup files
vim ~/.vnc/xstartup
Paste the following:
#!/bin/sh
Uncomment the following two lines for normal desktop:
unset SESSION_MANAGER #exec /etc/X11/xinit/xinitrc exec openbox-session & startlxqt & [ -x /etc/vnc/xstartup ] && exec /etc/vnc/xstartup [ -r $HOME/.Xresources ] && xrdb $HOME/.Xresources xsetroot -solid grey vncconfig -iconic & #x-terminal-emulator -geometry 80x24+10+10 -ls -title “$VNCDESKTOP Desktop” & #x-window-manager &`
Create startup script
sudo vim /etc/init.d/vncserver
Paste the following:
#!/bin/bash
BEGIN INIT INFO
Provides: vncserver
Required-Start: $syslog
Required-Stop: $syslog
Default-Start: 2 3 4 5
Default-Stop: 0 1 6
Short-Description: VNC Server Startup Script
Description: Author: Leo Gaggl (www.gaggl.com)
END INIT INFO
unset VNCSERVERARGS
VNCSERVERS=""
[ -f /etc/vncserver/vncservers.conf ] && . /etc/vncserver/vncservers.conf
prog=$“VNC server”
start() {
. /lib/lsb/init-functions
REQ_USER=$2
echo -n $“Starting $prog: "
ulimit -S -c 0 >/dev/null 2>&1
RETVAL=0
for display in ${VNCSERVERS}
do
export USER="${display##:}”
if test -z “${REQ_USER}” -o “${REQ_USER}” == ${USER} ; then
echo -n “${display} "
unset BASH_ENV ENV
DISP="${display%%:}”
export VNCUSERARGS="${VNCSERVERARGS[${DISP}]}"
su ${USER} -c “cd ~${USER} && [ -f .vnc/passwd ] && vncserver :${DISP} ${VNCUSERARGS}”
fi
done
}
stop() {
. /lib/lsb/init-functions
REQ_USER=$2
echo -n $“Shutting down VNCServer: "
for display in ${VNCSERVERS}
do
export USER="${display##:}”
if test -z “${REQ_USER}” -o “${REQ_USER}” == ${USER} ; then
echo -n “${display} "
unset BASH_ENV ENV
export USER="${display##:}”
su ${USER} -c “vncserver -kill :${display%%:*}” >/dev/null 2>&1
fi
done
echo -e “\n”
echo “VNCServer Stopped”
}
case “$1” in
start)
start $@
;;
stop)
stop $@
;;
restart|reload)
stop $@
sleep 3
start $@
;;
condrestart)
if [ -f /var/lock/subsys/vncserver ]; then
stop $@
sleep 3
start $@
fi
;;
status)
status Xvnc
;;
*)
echo $“Usage: $0 {start|stop|restart|condrestart|status}”
exit 1
esac`
Mark the startup script as executable and create the config file for the startup script.
sudo chmod +x /etc/init.d/vncserver
sudo mkdir /etc/vncserver
sudo vim /etc/vncserver/vncservers.conf`
Paste the following:
VNCSERVERS="1:USERNAME"
VNCSERVERARGS[1]="-geometry 1024x768"`
update-rc.d vncserver defaults 99
Start the VNC Server
sudo /etc/init.d/vncserver start
Firewall configuration
By default VNC will use port 9501 (and subsequent ports for each session). Since VNC password authentication is generally very weak I personally do not expose this port through the firewall. I use SSH port forwarding to tunnel the VNC port through SSH (encrypted) which means only the SSH port is open and can be properly secured.
ssh -L 5901:localhost:5901 -i /path/to/your/aws/keyfile.pem YOUR.EC2.IP.ADDRESS
You should then be able to access VNC via localhost:
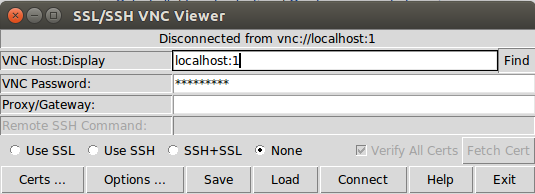
Hopefully you should see the LXQT Desktop:

If you want to access this from a Chromebook this blog might help.
Comments
Be the first to comment! Reply to this post from your Mastodon/Fediverse or Bluesky account, or mention this post's URL in your reply. Your comment will appear here automatically via webmention.
Follow this blog on Mastodon at @gaggl.com@web.brid.gy or on Bluesky at @gaggl.com