Open Source Is The Hope, But It Needs Our Help
In the last post, I explored the graveyard of ‘bricked’ devices—hardware rendered useless by corporate decisions. It’s a stark reminder that when you don’t control the software, you don’t truly own the hardware. The clear alternative is Open Source, but that path has its own critical vulnerability: sustainability.

But this is where the journey gets complicated. We flee to platforms like Home Assistant and embrace open-hardware projects, expecting a haven of stability and privacy. And while we find it, we often forget a crucial truth: “free and open source” does not mean free to create.
Are You Buying a Future Brick?
The promise of the “smart home” was a future of convenience, efficiency, and seamless automation. We bought into the vision of light bulbs that dim with a voice command, thermostats that learn our habits, and security systems we can monitor from halfway across the world. But for a growing number of consumers, that dream is turning into a nightmare of expensive, useless hardware. The culprit? A business model built on centralised control and proprietary systems.
Working Out Loud Again
As a new year begins, it’s a natural time for reflection. Looking back at the history of this blog, it started during my years working in online education. I was fortunate to be surrounded by inspiring colleagues who lived by the principles of “working out loud” and developing ideas “out in the open”. It was a vibrant, collaborative time.
A lot of water has flowed down the rivers Murray and Drau since then, and I’ll be the first to admit that my practice of sharing my work has become sporadic at best. I’m extremely keen to change that.
Where is Our Digital Heartbeat? A Hacker Culture Comparison
I’ve been living and working in Australia for a good while now, having moved from Europe with a healthy dose of open-source enthusiasm. Over the years, however, I can’t help but notice a stark difference between the two continents: the politically engaged, almost rebellious, hacker culture that is so vibrant in Europe seems to be missing its pulse here Down Under.
This has really hit home for me while watching the live streams from the 39th annual Chaos Computer Club Congress (39C3) in Hamburg. It’s one of Europe’s largest gatherings of hackers, activists, and creatives who don’t just write code, but actively question and shape the world it runs on. It’s a cultural phenomenon, not just a tech conference.
Modify Google Earth Viewshed Radius
One of the tasks Google Earth Pro is really useful is getting a quick idea of the viewshed from a specific location. This is particularly useful for planning solar installations or other infrastructure projects such as LoRaWAN gateway deployments.
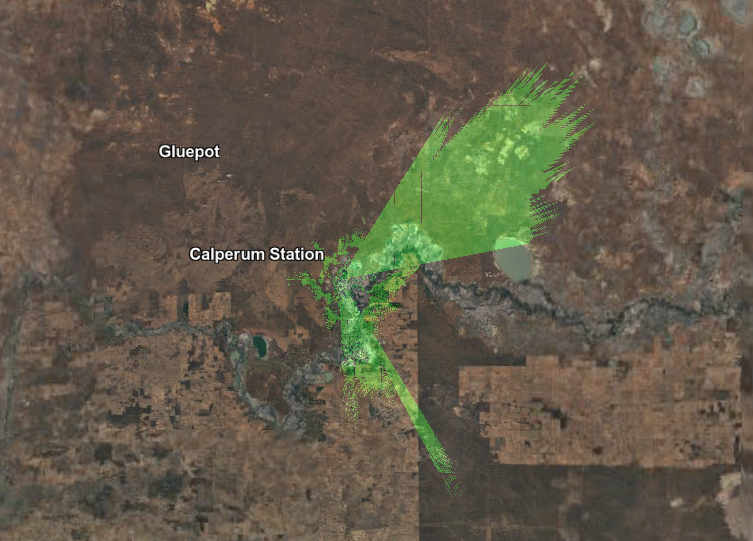
Whilst the tool is quite powerful, it has a very limited viewshed (roughly 5km) and this is not really useful when looking at gateway deployments that in flat regions of Australia easily can reach 25km+. Also it is not at all obvious how to modify the radius of the viewshed since that has not been a feature in the GUI and it is not documented at all.
Storing Raspberry PI timelapse images using Linode Object Storage

“possum cam testing” (CC BY-NC-SA 2.0) by leogaggl
One common task for my Raspberry Pi Zero with (infrared) Camera is to do still image capture in regular intervals and upload the images for storage and post-processing. A simple way to achieve this with standard software tools available in the Raspberry Pi OS repositories is to use the S3 CLI tools and a simple bash script run by a scheduled cron job.
Working with Siemens IoT2000 series from Linux
The Siemens IoT2000 series has been a very interesting development from Siemens and it’s really encouraging to see the use of Open Source in the Automation sector definitely on the increase. And that can only be a good thing for developer productivity. Seeing a different IDE for each manufacturer of a PLC invokes some nasty memories of last century web-application development…
 Unfortunately, all the documentation for these units still assumes a Windows PC. And since I have not really been using a physical Windows machine for 10+ years now, that is really slowing things down. For the last few I didn’t really have to fall back to a VM, largely due to the fact that in web-development nobody cares about OS any longer. But I have a feeling that shifting my focus to the IIoT space this VM will get a bit more useful as some of these manufacturers don’t even bother with anything but Windows and are challenged enough to keep up with Windows upgrades.
Extracting your Windows Licence Key from Ubuntu
Turns out that working with PLC equipment you are still fully stuck to Windows. Which means I have to bite the bullet and get an up to date version of a Windows VM running on my machine.
Since I have already paid for my Windows license with my laptop (even though I have never used it) this came in really handy.
sudo apt install acpica-tools
sudo acpidump -n MSDMThis command should dump the Windows key in the bottom right of the output.
Goodbye Twitter - you were useful for (quite) a while.
After getting rid of my Facebook account a long time ago, finally, I have decided to pull the plug on Twitter as well.
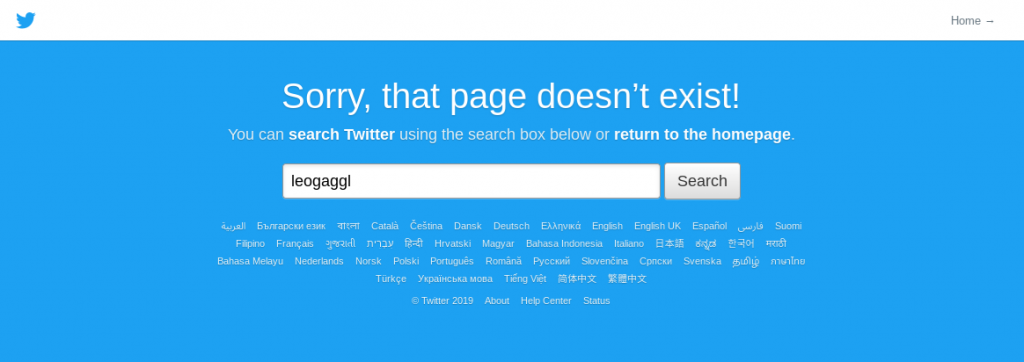 I have become increasingly wary of the changes of the platform as it seeks for a way to monetise it’s user-base. The timeline has increasingly become infested with annoying ads and no way of getting rid of them. Since Twitter effectively killed the whole app ecosystem with their changes to API rules and banning anything that became useful to a substantial number of people.
Setting up MultiTech LoRaWAN gateway on Ubuntu
As the convener for the Adelaide community of The Things Network, I am frequently setting up Multitech Conduit Gateways. Depending on your PC or notebook hardware you might have some problems with the Exar USB-UART driver on Linux.
Here are the steps to getting this unit setup from an Ubuntu (should work for any other Linux distro) machine.
lsusbShould show something like this:
Bus 002 Device 006: ID 04e2:1410 Exar Corp. XR21V1410 USB-UART IC
Moving to KVM virtual machines
Installing VirtualBox is getting increasingly painful on Ubuntu due to the problems with UEFI Secure Boot and the VirtualBox kernel modules. Another reason for an alternative is that running VirtualBox VM’s completely in the background is not as straightforward as it could be.
From the available alternatives I looked into (VMWare, Xen & KVM) it was KVM that fitted my needs (casual VM usage with mostly headless VM’s for testing purposes). Main reasons:
Microchip LoRaWAN Development Utility on Ubuntu
Having just wasted a few hours on getting this Java software running on Linux I am documenting this for future reference and hopefully saving other LoRa / TTN folks some time.
Prerequisites
Install a Java JDK + JavaFX. This should work with the default OpenJDK 8 or 9 which comes as part of the Ubuntu repositories. I ended up installing Oracle JDK 8 as well as I thought the error might be related to OpenJDK.